Let’s ROLL into Ailerons
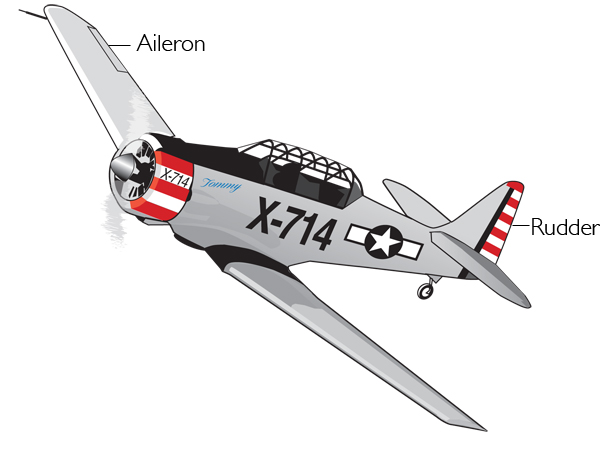
In this last part of our series on flight controls, we will discuss the Ailerons. These are located on the trailing (back) edge of the wing near the tip. They control Tommy about the Longitudinal Axis, or an imaginary line drawn through the center of the aircraft
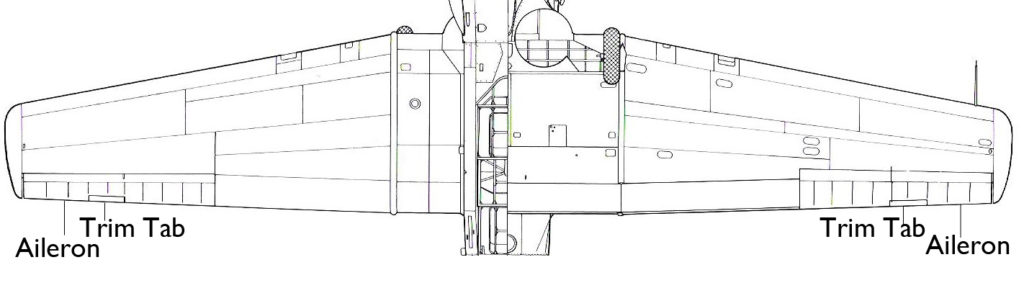
These differ from the other controls, as they move in opposite directions. They are controlled through rods and cables attached to the control stick. As Captain Billy moves the stick to the right, the aileron located on the right wing moves up while the aileron on the left wing moves down. The ailerons, like the elevator and rudder, also have trim tabs.
“Why does this happen?” you ask. Good question! Stay with me.
If you wish the aircraft to turn, you could just “kick” or turn the rudder, much like on a boat. But, with an aircraft you are working in three dimensions, on three axes, not just two. If you do this in an airplane, you would do what is called a “Skidding Turn.” Much like skidding a car on a slick road. In doing so, the outer wing will be going much faster than the inside wing, which, as we will learn later, can cause other problems.
So, to do a coordinated turn (a nice arcing, smooth turn) you will move the stick in the direction you want to turn. Doing so positions the inside wing’s aileron up. Deflecting the aileron into the smooth airstream over the wing causes two things to happen. One is a loss of lift, dropping the wing. The other is that it causes a drag on that wing, creating a turning motion. On the outer wing, the aileron is deflected down. This causes the wing to have a slight change to the airflow and causes lift. So that wing will rise.
If you keep the stick in this position you will roll the aircraft, and continue to do so until you correct it. So, what do you do to correct it? When you have the Angle of Bank (how far the aircraft is tilted) that you need, 15, 30, 45 degrees of bank angle, you would then position the stick back to neutral.
Now, eventually you would get where you are going, but like a skidding turn, it won’t be pretty or efficient. You would in effect be in a SLIPPING Turn. Turning into the dropped wing. Enter the rudder.
When you start your turn, you must apply the proper amount of rudder, and the proper amount of bank angle for a true coordinated turn. In some cases, a little bit of up elevator is needed, as the nose will tend to drop in a turn. Remember that “Balancing on a Pin” Captain Billy referred to in the Part One? It all comes together now doesn’t it? You are controlling an aircraft in ALL THREE AXES: Roll, Pitch and Yaw.
Blue Skys and Tailwinds,
Captain Billy
If you have any questions, email Captain Billy!
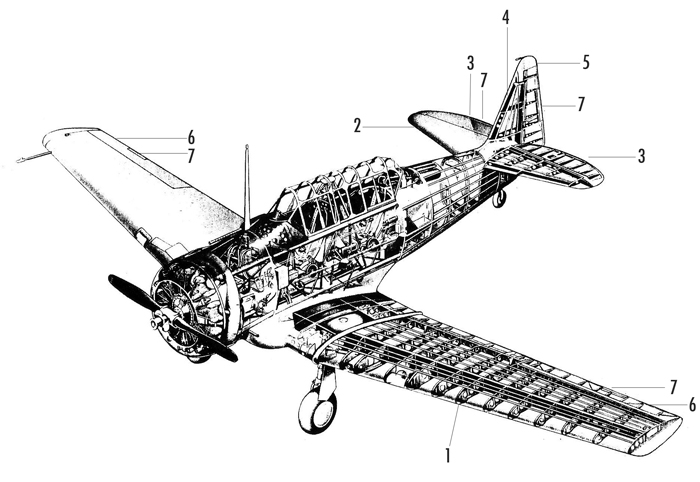
Control Summary Diagram
1. Wing Spar
2. Horizontal Stabilizer
3. Elevators
4. Vertical Stabilizer
5. Rudder
6. Ailerons
7. Trim Tabs
If you have any questions, email Captain Billy!